My view of NYC

My view of NYC
My view of NYC

Sunday, December 18, 2011

Module 6 revised typography


My 1st image shows a pristine view of a shoreline.


My 2nd image shows the same shoreline ravaged into a nightmare after years of environmental abuse.


My 3rd and last image shows an alternate future for this same shoreline if windmill energy was intergrated into its landscape.

Saturday, December 3, 2011

Module 6; Preliminary Images & Font Selections


My final project will be dealing with the ramifications of our current energy sources. I will show 3 images, a before picture of an unblemished environment, secondly a picture of the future if we make the wrong choices, and thirdly an image of hope for what could be.
Images Cited;
Image 1; beach scene/ widescreenwallpapers.org
Image 2; power plant
Image 3; power plant at night/ loupiote.com
Image 4; power plant/forbes.com/power plant
Coal Fired Power Plant
Image5; power plant at night
night power plant
Image 6; water windmill
Windmill Energy Windmill Energy
Image 7; land windmills
wind power technologies
Image 8; lightning
Image 9; angry sky red
Click to enlarge
Image 10; dolphins
A white-beaked dolphin bow-riding.
Image 11; geese in flight
Birds in Flight
Image 12; wild flowers
Namaqualand Wild Flower Arrangment
Image 13; dead flowers
Dead Flowers
Image 14; fence
Stock Photography - detail of a barbed 
wire fence at 
night. fotosearch 
- search stock 
photos, pictures, 
wall murals, images, 
and photo clipart
Image 15; dead seagull
Non-biodegradable rubbish and dead bird on beach.
Image 16; family at picnic
Image 17; blue field of wild flowers
Image 18; blue sky and white clouds
Image 19; eagle
Image 20; sailboat

How to Turn a Sailboat Overthumbnail
#1 font; Palace Script MT “Once upon a Time there was Beauty and Harmony…”
 #2 font; Castela “But Soon Darkness Filled the Land, Sea & Air…”
#3 font; Cambria Math “Until a Better Way was Found and Life Began Again…”

Friday, November 25, 2011

Module 5; 2nd Submit "Christmas Snow Globe 2011"


Module 5; 2nd Submit “Christmas Snow Globe 2011”

This was a very time consuming project which evolved as I went along. Some of the steps I did are listed below;
1-      I took my original Brooklyn Bridge photomontage and manipulated it into a sphere by using the 3D tool > new shape from layer > sphere.
2-      I superimposed this new image on top of the snow globe image by adjusting its size and position with the move tool key.
3-      I played with the opacity of the snow image so as not to lose the bubble details of the snow globe underneath it.
4-      I had to cut and paste all of the reflective light highlights on the snow globe. I took these segments of reflection from all the other snow globes I used in my project. I had to change the color cast of these varied highlights so they looked authentic in their new position. For example I casted the side highlights green so they would show a reflection of the pine tree that would have impacted their cast in real life. These side highlights also needed to be of less opacity in order to authenticate their position. The highlights on top of the globe needed to be brighter as they were not influenced by the pine branches and were in more direct alignment to the light source.
5-      I used the burn tool on 0% hardness and worked it under the snow globe where it sat on the stand in order to create a shadow. This made it look more authentic as there would be a slight shadow overhang from the globe onto the stand.
6-      The “Season’s Greetings from” font was Vivaldi. My gold color choice for these words was to mimic the gold of the snow globe stand and the pine branches. I sampled the gold color from a segment of the pine branch in order to get the correct cast and hue of the color. I double clicked the layer in order to bevel the lettering along with adding an inner glow to add further dimension.
7-      The “Brooklyn 2011” font was Old English Text MT. I chose to use two layers for this so I could better position the verbiage and adjust their warping differently. I manipulated the text by warping the words. I warded them differently as they would be placed in different spots on the snow globe and therefore have different curves. While the “Season’s Greetings from” was done in 100% opacity I chose to make the “Brooklyn Bridge 2011” wording in 80% opacity in order to make it more realistic on the glass globe. The choice of red for this verbiage was to tie back to the berries on the pine branch. I sampled a potion of the berry on the pine branch in order to choose a red color cast that worked with the image.
8-      In order to create the double picture frame I used the Rectangular Marquee tool to isolate the top and sides of the gold segments. I chose the red and gold colors by sampling the red and gold in the verbiage. This tied in the frame colors to the image composition. Once satisfied I created a copy that I transferred to the alternate sides by clicking on the segment while pressing the Alt button. I then double clicked this layer in the layer panel in order to access the bevel and inner/outer glow/shadow options.
9-      I repeated this process in order to create the red portion of the frame.
10-   I did the above two steps originally in reverse which unfortunately gave the impression that the gold segment protruded out from the red segment. I wanted it reversed, so the outer red segments protruded over the gold segments. I had to do the procedure in the reverse order in order to accomplish this.
Overall I’m pleased with this image and will make Christmas cards from it. I will need to save the image in a format that will best optimize the image’s print quality. I will make sure I tag my file with the RGB mode. The printer should then be able to change my image to CMYK mode for printing.

Image Citations;

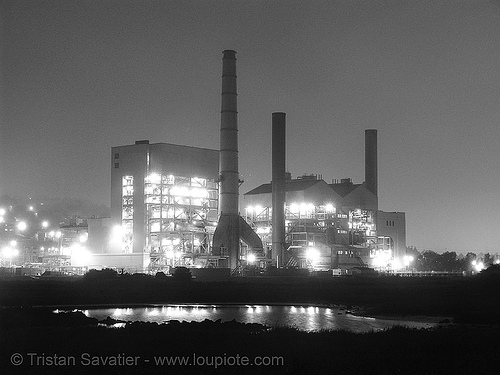
Snow, Christine. “Brooklyn Bridge in Snow; 1883-2011”.
snow-globe-largethumb 5995122 misspageturerscityofbooks.blogspot.com

lens 1596462-1258315 squidoo.com

58329797articles.latimes.com

1085349-snowglobe journeysmomentslong.blogspot.com

snowglobe_full.jpg 91.freeze.com

Thursday, November 24, 2011

Module 5 - 1st submission


This is the 1st of 2 images I will be submitting for this assignment. I used my own eye image as a starting point of my new image. I then added the layer of my Module 2 Photomontage submission to this composition. Below are some of the steps I performed in order to create this image;

1-      In order to create the spherical dynamic of my Brooklyn Bridge image I had to manipulate  by going to the tool bar; 3D > new shape from layer > sphere
2-      I next had to nestle the layer over my actual eye pupil by manipulating the size and position with the move tool.
3-      To create the feeling of the top of the being nestled under the top eyelid I used the burn tool. This added darkness and gave the impression of the upper lid overhanging the eye.
4-      I had to clean-up the white of my eye differently on both sides. The left sided needed to be lightened as well as having some red pigment removed. I sampled a color in my eye with the sampling tool and then I painted over the imperfections with a small soft brush. Next I used the smudge tool to blur and even out the area. I sampled a slightly lighter color and added it to the center area in order to create a slight highlight that gave the effect of depth and inferred the circularity of the eye.
5-      I added more eyelashes by choosing the brush that looks like a curved stroke. There are 2 such brushes curving in different directions so I alternated using them depending on where I was adding more lashes. I kept re-sampling colors so I had a gradation of colors within the lashes I added.
6-      I cleaned up the many imperfections around the bottom of my eye with the smudge tool.

Many other steps were taken in order to achieve my final image. The above 6 steps are just some of the manipulations I did. There were considerably more things I did (and undid!). I’m beginning to realize how important it is to document the steps I take in order to recreate similar effects in the future.

Images Cited;

Snow, Christine. "Brooklyn Bridge in Snow; 1883-2011".
Snow, Christine. "Eye Close-up; Self Portrait"


Sunday, November 20, 2011

Module 5 Photoshop Image Components


 My Module 2 photomontage "Brooklyn Bridge"


snow-globe-largethumb 5995122
misspageturerscityofbooks.blogspot.com


lens 1596462-1258315
squidoo.com


58329797
articles.latimes.com

1085349-snowglobe
journeysmomentslong.blogspot.com


snowglobe_full.jpg
91.freeze.com


fonts; old english/vivaldi 


self-portrait


The above pictures will be used for my Module 5 project. I'll be working from my "Brooklyn Bridge" image from Module 2. I want to experiment and will be doing 2 images for this project. The first will be done with the snow globe images above. I'll also be experimenting with a 2nd image using my own picture, the eye shot above.

Saturday, November 12, 2011

Final Submission: "Scarface" Book Cover


Revised Book Cover Scarface
      The original book cover in my opinion lacks the drama of its tragic lead character. Tony Montana is ruthless, compassionless and has clearly gone over to the dark side of his nature. He communicates to the world through blood and violence to the point where he becomes inhuman. He reduces the people in his life to two categories; those he perceives as a threat and in need of elimination and those he "loves" through control and manipulation. My book cover will emphasize the de-humanization of his image while showing the brutality and bloodshed that defines him.
      My intention was to make Tony inhuman. The decomposition of his face was achieved by manipulating the color and rearranging the pixels to get a flat gritty likeness of the original image. He is meant to look dead while still alive, a shell of a man looking out of dead eyes. Only one glint of light off his right eye alludes to life. The stark black and white of the background represents good and bad. Here Tony’s image is shown to be part of and connected to the black background. He blurs into the darkness. The gleam of his necklace and eye show the only bit of light in his picture. The bullet ridden font used for the word”Scarface” is colored in blood red. The highlighting and faceting of the font make it look wet and dimensional. The type seems to be wrapping itself around his head as if his nickname, blood and violence enshroud him.
      The only image I chose to take from the original book cover was the face of Tony. I also needed to retain the book title and its author. I chose not to use its other verbiage in my new cover. To achieve my image I had to do the following to the image and text;
1-       I isolated Pachino’s image and put it on a new document.
2-       I had to clean up the area where type was on his head. To do this I used the eraser tool along with the     clone tool.
3-       I solarized his image as per the tutorial in module 4.
4-       I adjusted the hue/saturation and vibrancy of the image along with adding 5% noise.
5-       I chose Starshine MF font and manipulated it as per the module 4 tutorial. I further manipulated it by selecting it and distorting it by manipulating its anchor points.
      I performed the following additional steps for my final submission;
6-       After choosing a font color I further manipulated the type by adding the special effects of drop shadow and bevel & emboss. To access this window I double clicked on the text layer. This helped the verbiage look more dramatic and dimensional while giving the characters a wet, bloodlike feel.
7-       I polarized Pachino’s face by going to menu/adjustments/polarize. The sliding scale enabled me to reduce the shades of black/white/grey to a few. This effect flattened the image and gave it a more gritty, harsh and iconic look.
   The entire process was a series of experiments with the manipulation of various effects. I tried many effects under image/adjustments and under filters. Some of them didn’t give me the effect I was looking for so I kept experimenting with other effect tools until I was satisfied with my image.
Image citation;
Banks, L.A. Scarface. 2006 Publisher: Dark House Comics. Milwaukie, OR.
Print
Amazon.com. Bookstore. 10. 20. 2011. Web.